1. Introduction
In the previous article, we have mentioned that IoT devices such as Router, Access Point, and IP Camera can be compromised and turned into botnets. There are several existing hacking techniques could help attackers implement this kind of attack, and exploiting vulnerabilities enduring in IoT devices is one of them. This research series aims to provide readers with in-depth knowledge and objective perception of different IoT vulnerabilities that hackers can exploit.
In this article, we would like to introduce about QEMU, which stands for Quick EMUlator, can perform hardware virtualization. Using QEMU, researchers can set up virtual environments simulating Router, Access Point and IP Camera to facilitate vulnerability research processes. Studies carried out with QEMU can help security researchers explore unrevealed vulnerabilities hiding inside devices so that manufacturers can patch them.
Why should we use virtual devices instead of real devices?
There are several advantages, namely, cost & time effectiveness and user-friendliness that virtual devices possess when comparing to real physical ones:
- Cost-saving: There is no need to spend a significant amount of money purchasing expensive devices when utilizing virtual devices.
- Time-saving: It is incontrovertible that installing virtual devices takes much less time than ordering, shipping, and installing physical devices.
- User friendly: It is easier for us to work in virtual machines than in physical ones.
However, we can meet some struggles when working with virtual devices because some are not comprehensively similar to physical devices, and some are hard or impossible to be implemented in simulative environments.
2. Virtualizing processes
Environment setup
In this experiment, we are going to use the tools listed below:
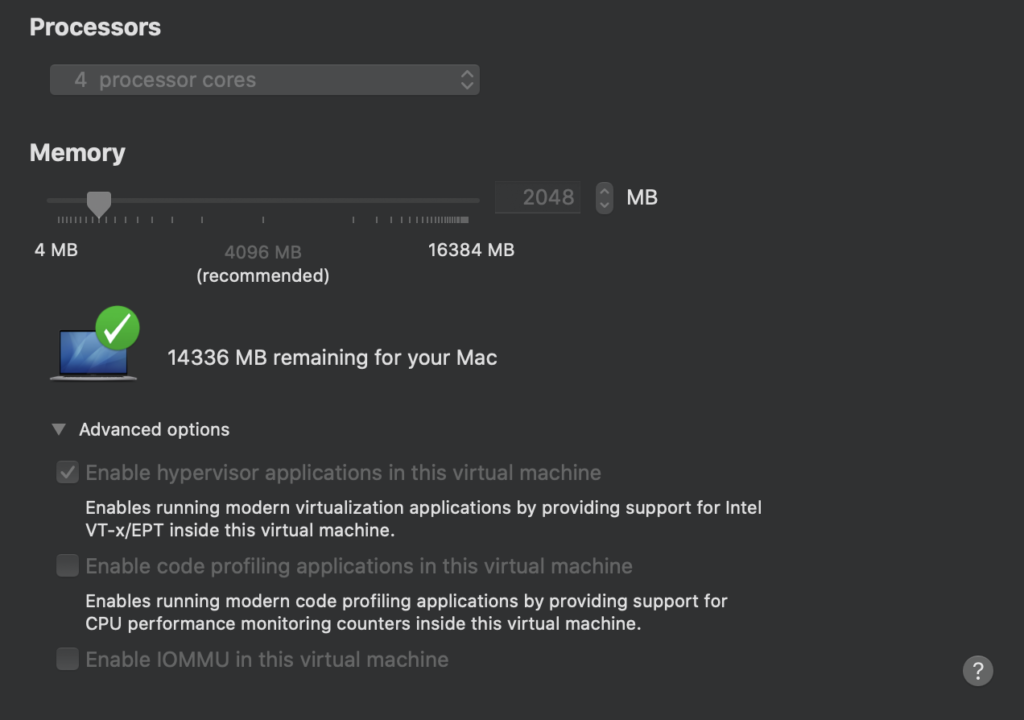
For the Linux virtual machine, we recommend using Ubuntu Server 16.04. Please note that you must select the option “Enable hypervisor application in this virtual machine” when configuring the Linux virtual machine. Below are some minimum required specifications for the Linux machine:
- MEMORY: >= 1GB
- CORES: >= 2
- HARD DISK: >= 30GB
After successfully installing the Linux machine, download the setting script setup.sh and run.
Virtualizing experiment
In this part, an actual experiment is demonstrated so that readers can have a better insight into how all the virtualizing processes take place. We select Router DIR-882 manufactured by D-Link in this experiment since it contains quite comprehensively enough information and requirements to generate virtualizing.
First of all, go to https://support.dlink.com/ProductInfo.aspx?m=DIR-882-US and then download the Firmware of the router.
Step 1: Find the device’s rootfs
After downloading the firmware, we need to perform firmware extracting to obtain rootfs. However, this process’s details are beyond this article’s scope, so they are not presented here. You can find the instruction on implementing this step in this ZDI’s blog post.
Step 2: Examine the device’s architecture
After extracting the device’s rootfs, we need to know the router’s architecture to virtualize it by QEMU. We can run the command $ file rootfs/bin/busybox to obtain this piece of information.

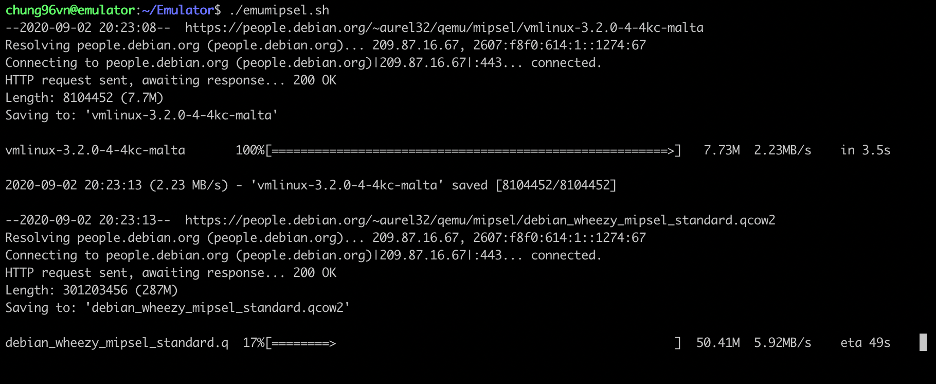
It is shown in the result that this device uses mipsel architecture (Little-endian), and we need a machine that has the capability of analyzing this architecture. In this experiment, we will utilize a pre-built mipsel virtual machine to facilitate the process. To ease the installation of the mipsel virtual machine, we have prepared a setup script named emumipsel.sh that you can find at this link.
After installing the mipsel virtual machine, you can log in with the username/password combination root/root.
Step 3: Get rootfs into the QEMU virtual device
It was in step 2 that we succeeded in obtaining rootfs, and now we will copy that into QEMU.
Zip all the rootfs data:
- $ tar -czvf rootfs.tar.gz rootfs/
Use scp in the Linux machine to copy the created tar file:
- $ scp [email protected]:/path/rootfs.tar.gz .
Unzip the tar file:
- $ tar -xvf rootfs.tar.gz
Step 4: Virtualize nvram
NOTE: It is unnecessary to apply this step to virtualize devices that do not encompass nvram.
On exploring the router DIR-882, we recognized the appearance of nvram; however, QEMU does not support the virtualization of nvram, so we must employ another tool to perform this action.

Wandering around the Internet, we figured out a pretty excellent tool called libnvram that could support virtualizing NVRAM in this case. To build a libnvram, we need to use a cross compiler; therefore, if you do not have a cross compiler in your machine, please download a suitable one following this link:
After building a libnvram, you can use the command scp to copy it to the QEMU virtual machine.
Step 5: Configure the QEMU virtual machine
Before proceeding, we must consider the below points:
- The simulating router will use virtual hardware devices provided by QEMU, so mounting or unmounting those devices can cause an operating problem.
- The router will utilize the QEMU virtual machine’s network adapter directly, so there stands a chance that the router’s configurations damage the connection between the QEMU machine (guest) and the Linux machine (host).
We must alter some startup configurations of the router so that its operation will not negatively affect the QEMU machine’s functions.
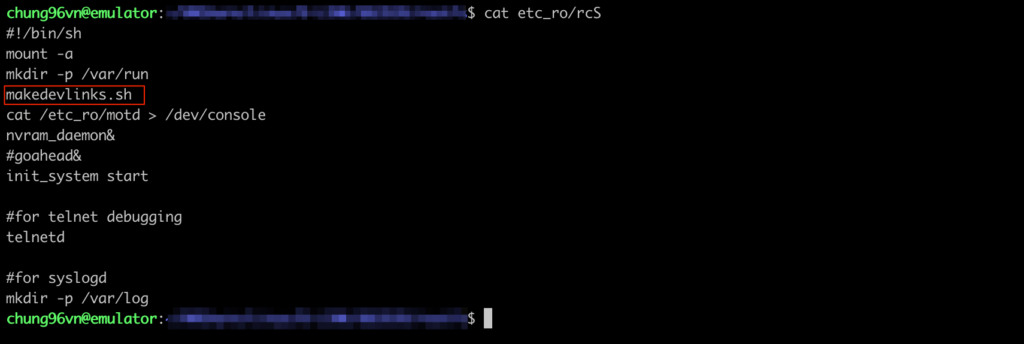
When reading content inside the file inittab, we saw that the file /etc_ro/rcS is started when the device is on boot, which proves that /etc_ro/rcS is the startup file of the router.

On examining rcS and other files called by rcS, we recognized that the script file makedevlinks.sh was called to execute mount and mknod. We commented out the line of code in rcS that called makedevlinks.sh so that it would not affect the QEMU machine when booting.
Step 6: Start visualizing
First, we need to mount some resources so that they can be shared between the QEMU virtual machine and the router.
- mount -o bind /proc rootfs/proc/
- mount -o bind /dev rootfs/dev
- mount -o bind /sys rootfs/sys
In the next step, we move the libvram instance to the rootfs folder and configure it:
- mv path/libnvram.so rootfs/libnvram.so
- mkdir rootfs/firmadyne
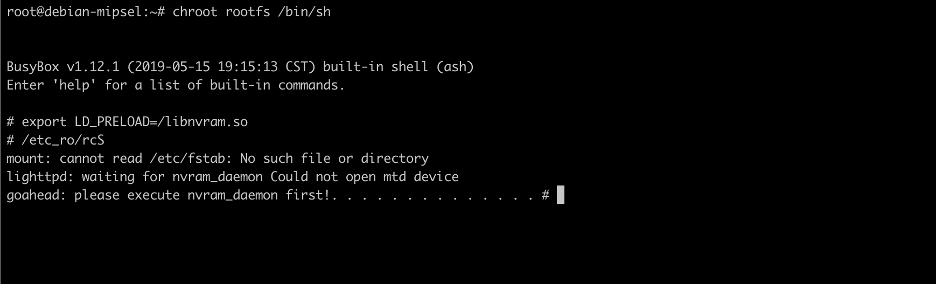
Perform virtualizing by chroot command:
- chroot rootfs /bin/sh
Inside the chroot environment, run below commands:
- export LD_PRELOAD=/libnvram.so
- /etc_ro/rcS
Wait until the command finishes running.
Step 7: Fix errors (if exist)
Problem: lighttpd service does not appear when checking the system.
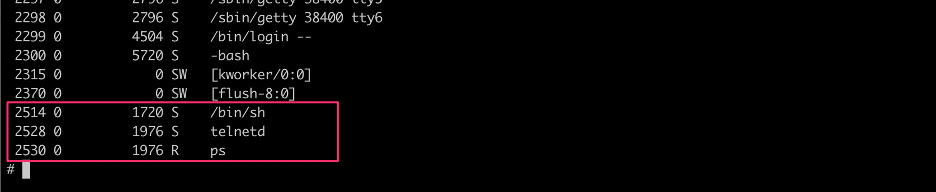
By examining events happening after /etc_ro/rcS was executed, we found out that lighttpd should have been started by /bin/init_system, but there was a problem with this process.
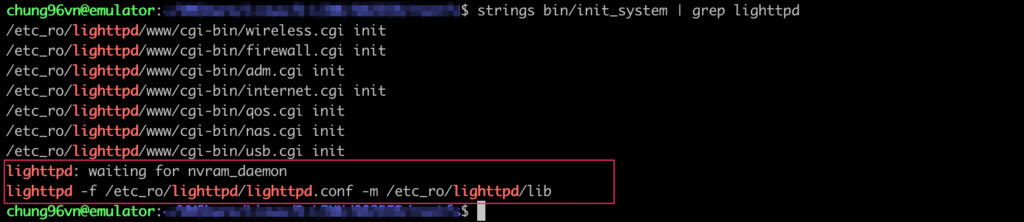
By reverse engineering the file init_system,we figured out that the problem lied in the fact that /var/run/nvramd.pid did not exist in the system.
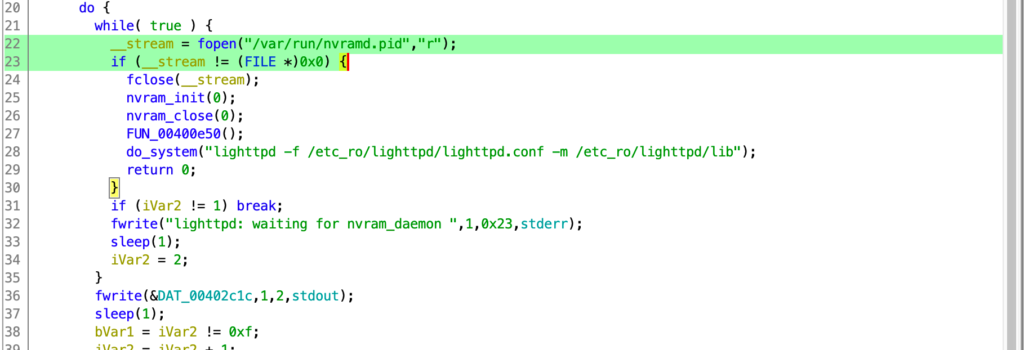
We tried to run the command executed in init_system to see if the problem could be solved:
- lighttpd -f /etc_ro/lighttpd/lighttpd.conf -m /etc_ro/lighttpd/lib

After running the command, we still saw an error that might have been caused by lighttpd itself. We tried to comment out all lines in the file /etc_ro/lighttpd/lighttpd.conf to see if the error still occurred.
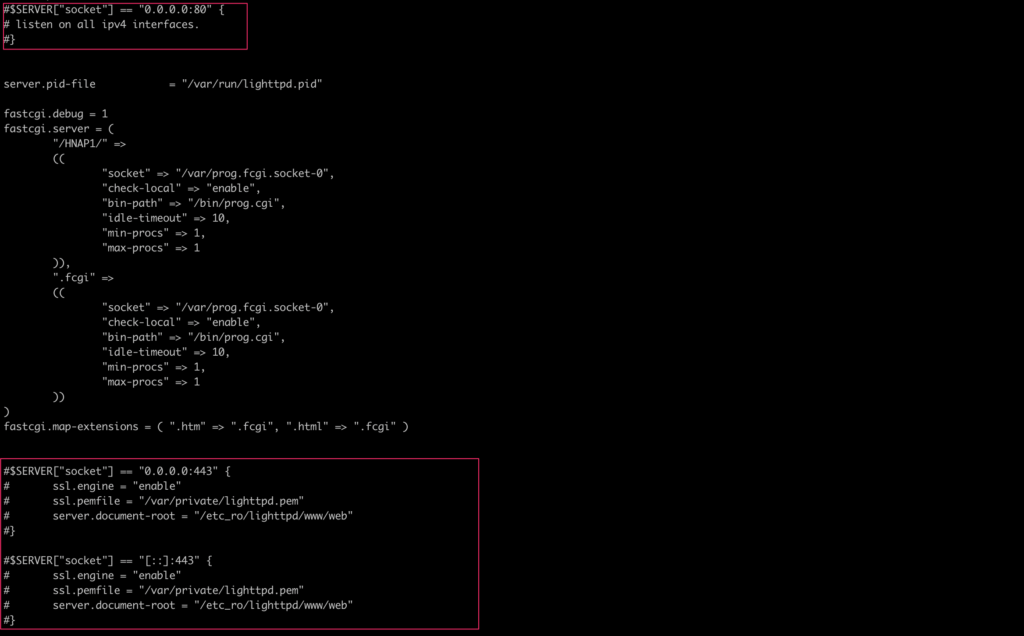
After doing that, we finally succeeded in starting lighttpd.

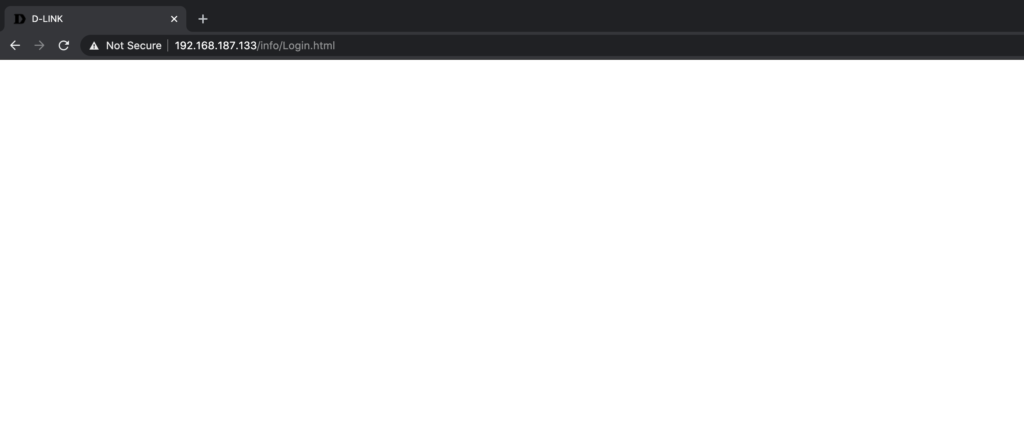
Even though the simulating router could not provide all the features like a real device, we could still take advantage of it to debug lighttpd or other services running on the device.
This writing is quite long up to this point; therefore, we hope that in the future, we can present to you the detailed procedure of setting up an environment for debugging.
3. Conclusion
In essence, creating a virtual device by QEMU is not too hard. However, this process requires the implementers to be knowledgeable about different aspects and carefully understand the machine they want to virtualize. The first attempt of virtualizing a device will cost you time and effort, but you will be familiar with this task when performing it more often.
In the future, we will deliver to you more writings on this topic and other exciting issues. Thank you so much for spending your time with us. Please share and comment if you find this post beneficial.
Credit: @chung96vn